|
|
What equipment do you need for collecting
minerals or fossils in the field?
This page has been published in response to the many
queries we have received about suitable equipment for
mineral, rock and fossil collecting. It also covers
some of the aspects of using tools safely and good
collecting practice.
To be able to collect geological specimens, when out
in the field, there are some basic pieces of equipment
that are essential if you are going to get the best
from your hobby. There is no point in skimping on
equipment. Imagine the disappointment of walking many
miles, over rough terrain, to collect at a particular
site and you do not have the right equipment to enable
you to recover that superb specimen that is sitting in
a massive boulder, or even worse your cheap hammer
breaks.
|
|
|
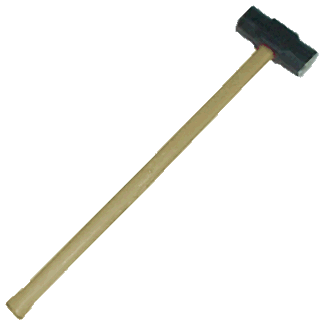
The most important piece of equipment is a hammer. This
is used to break rocks, hit chisels and even dig in old
dumps. There are many different styles of hammer with
masses from 0.5 kg (1 lb) up to 6.5 kg (14 lb)
sledgehammers (left). The heavier a hammer the more
energy you can deliver into a hammer blow. You can have
wooden handles, covered solid steel, fibreglass, nylon
and many others. Modern composite handles are lighter
and more durable but traditional wooden handles can be
replaced should they break. The longer the handle the
more leverage you get and hence more power.
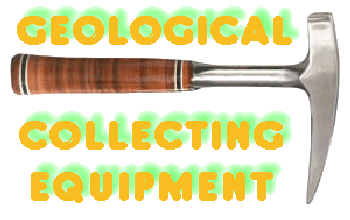
The traditional "geologists' hammer" is
shown below left. This has a flat striking face and a
chisel face. The flat face is used to strike hard rocks
and break off pieces or to strike chisels used for rock
breaking and trimming. The chisel end is useful for
breaking softer rocks and rocks with a natural cleavage
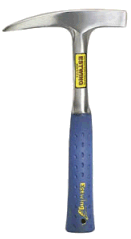
such as shale. On the right is the hammer that is now
popular with many geologists and that is the "rock
pick". This American tool is extremely good and
durable. It will give very many years of service. They
come with a range of coverings on the solid forged
steel handle.
|
|
|
When selecting a hammer be aware that you may have to
carry it long distances so a lighter one may be
preferable. Generally for field use anything less than
1 kg (2 lb) is not sufficient to break large rocks. A
good choice is a long handled 1.8 kg (4 lb) club hammer
(shown below centre) for general use, a 1 kg (2 lb)
geological hammer for small rocks and trimming and a 3
kg (7 lb) sledgehammer for breaking up big boulders.
Please spend as much as you can afford on a good hammer
you will not regret the investment and a good hammer
will last a very long time.
|
|
|
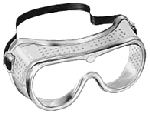
Remember that when breaking rocks you must wear some
form of impact resistant eye protection such as
protective glasses or goggles. Small pieces of sharp
rock can be ejected at great speed and cause permanent
damage.
NEVER, EVER HIT A HAMMER WITH ANOTHER
HAMMER!
THE HAMMER MAY SPLINTER IF STRUCK AGAINST ANOTHER
HAMMER OR OTHER HARD METAL SURFACE. THIS MAY RESULT,
NOT ONLY, IN DAMAGE TO THE TOOL BUT INJURY TO YOURSELF
OR OTHER PEOPLE FROM FLYING METAL FRAGMENTS.
|
|
|
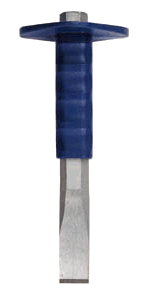
The other tool you will need to enable you to break
rocks is a cold chisel. Here the range of size, shape
and quality is enormous. For general purpose use a good
quality 200 mm long chisel with a 20 mm - 25 mm wide
blade should be sufficient for most applications. You
may wish to consider having one with a hand guard
fitted. This gives better grip in wet conditions and,
of course protects your hands should you miss with the
hammer. A selection of other chisels from long shafts
to small pointed ones may be carried though you must
match them to the hammer you will be using. There is
little point in using a small chisel with a 3 kg sledge
hammer. Once again you should remember that chisels are
heavy and you may have to carry them long distances.
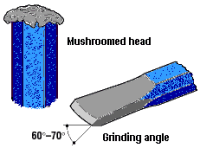
Care of chisels is very important. The head is much
softer than the cutting edge so that it can be hit
safely with the hardened face of your hammer. Repeated
use causes the head to dome over and mushroom. This can
form sharp edges that should be regularly removed by
grinding. The blade should also be ground back to shape
and the correct angle to maintain the efficiency of the
tool and prevent the edge chipping.
|
|
|
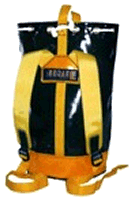
Now you have started to acquire your equipment you will
need something to carry it in and all those wonderful
mineral or fossil specimens you are going to collect.
Here a good strong rucksack is required. The best are
those sold by caving equipment suppliers (left). These
are tough, waterproof and durable, they will withstand
having heavy rocks and sharp tools being dropped in
them. Do not use thin nylon bags as these can tear with
sharp rocks cutting into them. Get one large enough for
your needs that will take all of your gear but make
sure that there is sufficient space and protection for
your specimens. It must also be comfortable to carry as
a full rucksack with tools and rocks can weigh up to 25
kg (55 lb).
|
|
|
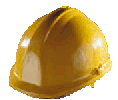
When collecting in working quarries or mines there may
well be a mandatory requirement for safety equipment to
be worn whilst on site. This usually is, as a minimum,
a hard hat, protective gloves, high-visibility jacket
and steel toe capped safety boots. It is sensible to
wear this personal protective equipment when collecting
in any hazardous area for your own safety. All safety
equipment must be replaced immediately if worn out or
damaged.
|
|
|
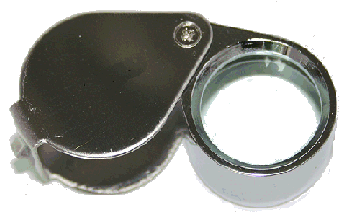
One other essential piece of equipment is a good hand
lens (magnifying glass) to enable you to examine
specimens. Here again the range and choice is enormous.
Cost is also a major factor, good lenses do not come
cheap. The ideal hand lens is a x10 magnification with
a good achromatic, compound glass lens. Plastic lenses
are useless as they scratch easily and can also affect
the colours of mineral specimens. The lens should be
able to be protected, when not in use, by folding it in
to a case. As they are small and easily lost many
collectors hang them on a string hung round their necks
or attached to a belt for security. There are different
magnifications available up to around x20. Generally
the larger the magnification the smaller the diameter
of the lens and the shorter the distance at which you
have to use it. With greater magnification the
"depth of field" is reduced. That is the
depth over which the area you are viewing appears to be
in focus. When using a hand lens you should hold the
lens as close as possible to your eye (it is not
usually necessary to remove spectacles) and move the
specimen in and out to achieve the focus on the area
you are examining.
There is a lot more equipment that you will or may
need depending on the type of collecting you are
intending to do. Below is a list of equipment that you
should consider having to cover all eventualities.
ENJOY YOUR COLLECTING!
|
You can copy this table and paste it into a word
processor document. If you print off a copy you can use it to
check off your equipment before you go out into the field and
find you have forgotten something. Click the link to download a
copy of the Society's Field Trip Guide and
Rules (PDF).
An accepted code of practice for field collecting
is now essential if the opportunity to collect is to be
retained. Many sites are over collected and site owners are
less likely to give permission to collect if damage or
inconsiderate collecting is occurring. Compliance with this
Code of Practice will help to ensure that sites remain usable
and accessible for all now and in the future.
